


There are 11 steps from concept to creation: design, choosing a manufacturing method, quoting and picking a supplier, tooling, casting, heat treat or shake out, machining, inspection, polishing, finishing, and shipping.
Each casting is custom! Not every part will go through every step. But theses are all the potential steps you can expect when manufacturing your custom design by permanent mold aluminum casting.
The first step to getting your custom part manufactured is designing. Typically, engineers come to us with their blueprint, SolidWorks file, or other files. They have a custom part designed with the function, look, and end environment in mind. Now, they just need to make it manufacturable.
Alternatively, engineers will come to us with a part they already have in production, but they are looking to improve. In this case, we can 3D scan the part, develop a blueprint, and add adjustments as needed.
Prototyping is often part of the design phase. It typically involves multiple iterations of a design with slight changes/improvements. Prototyping is a great way to gain confidence in your design, but be careful!
Follow these tips to make sure your prototype is manufacturable on a large scale!
Some manufacturing methods lend themselves to prototyping more easily than others. For example, with machining, it’s easy to make a one-off part, then tweak the process and make another one. However, with permanent mold and die casting, it is expensive to change your mind after cutting a custom mold into steel.
If you’re looking to prototype a casting, we recommend reviewing our guide to designing for permanent mold casting, then machining a similar part from billet. Remember: unlike machined parts, castings require draft, rounded corners, minimum wall thickness, etc. You’ll want your machined prototype to reflect this.
The final manufacturing method should be considered during the design stage, but is often an after thought. Depending on the manufacturing method you choose, you may have to adjust your design to make it efficiently manufacturable.
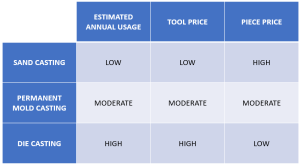
These four factors often determine which manufacturing method you use:
Not every material can be used in each manufacturing method. For example, we permanent mold cast aluminum and zinc (A356, ZA5, and ZA12) in steel molds.
If you’re looking to manufacture a steel part, you cannot use permanent mold or die casting since these molds are made of steel. Instead, look into sand casting or investment casting.
Which material will meet your strength, weight, or corrosion requirements?
In general, you’ll see the best casting ROI with…
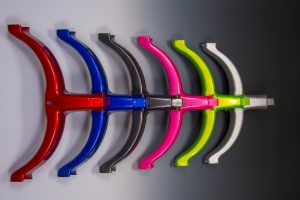
Surface finish may be important for customer-facing parts, such as walker handles or fire truck sirens, or food and medical equipment that must be clean.
High RMS surface finishes are rougher than low RMS surface finish. Average as-cast RMS surface finish is…
Surface finish can also be achieved by secondary polishing.
Remember, if you are machining or powder coating a casting, make sure it is low-porosity. Machining and polishing high porosity castings will open up pits and holes. These defects will be amplified in powder coating.
The strength requirements, density, or the need for a pressure-tight part may impact the manufacturing method you choose.
Unlike other casting methods, permanent mold aluminum casting can easily provide low-porosity, dense, pressure-tight parts. Heat treat can also be added to increase the strength and mechanical properties of aluminum.
If you did steps 1 and 2 right, comparing quotes is quick and accurate!
When requesting a quote, consider…
When comparing suppliers, consider…
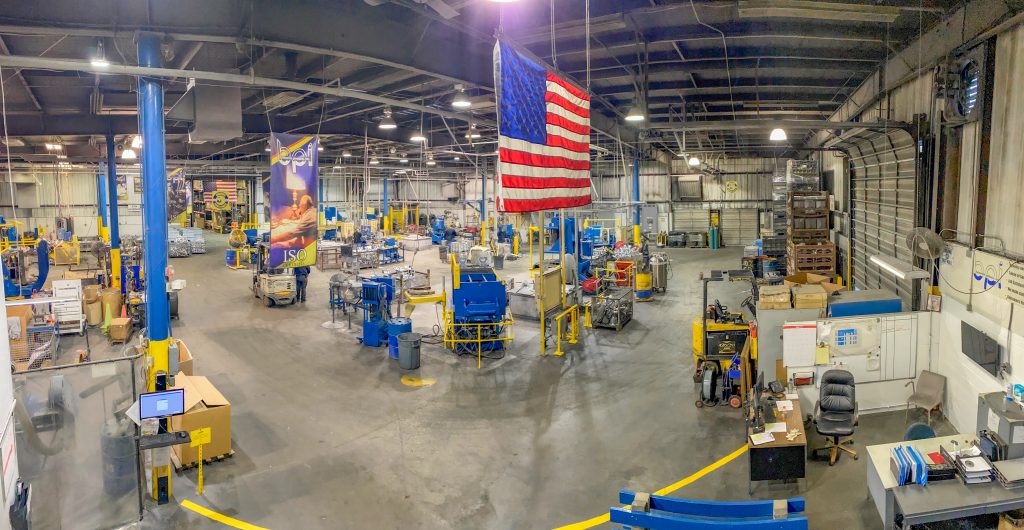
We highly recommend visiting potential suppliers before making your final decision.
Tooling is the last preparation step before production. Tooling refers to the mold. It includes designing the number of cavities, gating, runners, risers, vents, chills, ejection system, parting line, pull cores, etc.
Tooling cost varies depending on the casting process, typically with sand casting being the lowest cost and die casting being the highest cost. Permanent mold falls in-between.
If needed, in this step, you’ll also produce sand cores (and the core box) and fixtures for sawing, machining, inspection, or powder coating.
If you’re new to casting, search for a foundry that handles tooling design. This ensures your tool will fit their equipment and be optimized for their casting process.
When building your tool, a good foundry will perform a Finite Element Analysis. This simulates the flow and solidification of the metal so your tool can produce the best parts possible. It sets you up for success!
If you’re transferring a tool, no problem! Just keep in mind it may need to be retrofitted to adjust to the foundry’s equipment and process.
Casting is the first step of production! This is when your mold is set up on the tilt pour press, programmed, preheated, and specially coated. The furnace is prepared with the correct material, at the correct temperature, at the correct gas level.
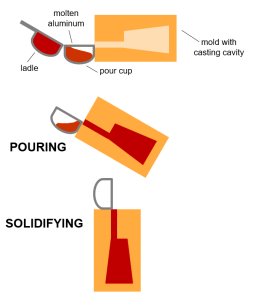
The most common permanent mold pouring method is the tilt pour or reverse tilt pour. The tilt pour is machine controlled. First, the operator pours metal into a pour cup. Then, the machine slowly tilts to allow the metal to smoothly flow into the mold. The machine sits completely horizontal to allow the metal to solidify in the mold. Finally, it returns to its vertical position, and ejects the casting. By machine controlling the tilt timing and flow, you have better control of turbulence and porosity.
The tilt pour method is like pouring a beer down the side of a glass. It decreases turbulence, which decreases porosity. Air pockets or high porosity can make your part weaker, less dense, and difficult to machine and powder coat.
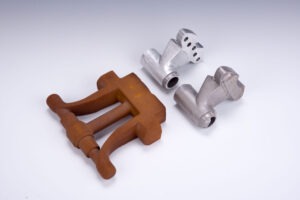
After casting, a quick sawing operation will remove the gating and risers, giving you a near-net-shape part.
Two optional add-on operations are heat treat or sand core shake out.
A heat treatment refers to when an already cast aluminum part is heated at a high temperature and systematically cooled to increase material strength and hardness, reduce stress, increase stabilization, or change its properties.
At BPI, our aluminum castings can do a T5 or T6 heat treat.
Sand cores are used to make hollow cavities inside your part, often for wire channeling or assembly. This is called semi-permanent mold.
The core is placed in the mold during the casting process. When the metal fills the mold, it surrounds the core and hardens. Then we remove the core and voila! A hollow internal section.
Sand cores can be removed with an added shake out operation. This process aggressively vibrates the casting until the sand falls out.
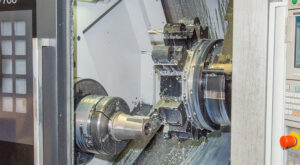
Castings are near-net-shapes of the final product. Often, a quick secondary CNC machining operation is used to add features, achieve tighter tolerances, removing casting design requirements, improve the surface finish, or achieve a more complex part.
For many products, it’s more efficient to cast the shape first than entirely machine it out of stock material. If you work with a foundry that has an in-house machine shop, or a machine shop that specializes in castings, you’ll have an advantage. Machining a casting is different from machining billet!
This step also includes programming the CNC machines and developing the correct fixtures. During machining, operators may also inspect for and remove any flash.
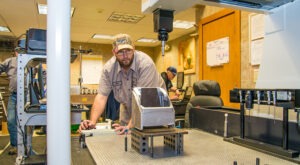
If you have inspection requirements, tell your supplier in the beginning stages what features are critical. Then, they can put checks and balances into the process to efficiently provide high-quality parts.
Inspection is important, but can big a big cost driver. Find a balance. 100% inspecting 200 dimensions on a part will explode your costs, but 100% inspecting 2 dimensions on a part is a doable, common practice.
Inspection options include but are not limited to…
A First Article Inspection (FAI) is performed on an initial sample, proving that the manufacturing process produces an acceptable part that meets all specifications. It is a total inspection of one part, comparing it to the drawing or model requirements.
Production Part Approval Process, or PPAP for short, is an authentication method where suppliers ensure the reliability, consistency, and correct manufacturability of parts. It improves the communication process by laying out clear guidelines and expectations between the supplier and customer. It’s a more labor-intensive (and higher cost) process with 5 different levels.
Each casting process has a unique natural surface finish. Permanent mold casting surface RMS is typically 200-420, which is smoother than sand casting. Some customers stick with the as-cast surface finish and just add a short polishing operation to remove the parting line and smooth the edges. Often, these parts are assembled on the inside of a machine, so, their appearance isn’t as critical as their functionality.
Other customers, such as medical equipment that is seen by patients, prefer a class-A finish. These parts may be polished to a certain grit number, or even mirror buffed.
Other high-class finish options are powder coating, painting, anodizing, or chrome plating. If you desire these finishes, you’ll still need a polishing operation. Polishing will “rough up” the surface so the coating has something to stick to. It will also serve as your final “defect check” to make sure any holes or scratches won’t be amplified by the coating.
To save time and money in the polishing step, be sure to call out critical (and non critical) aesthetic surfaces. This prevents the supplier from overdoing it and over charging you for unnecessary services, or scrapping acceptable parts.
If you’re looking for an aesthetic finish to your product, try powder coating, painting, anodizing, or chrome plating.
Considerations in the finishing stage include fixturing/racking, masking, and critical vs. non critical surfaces.
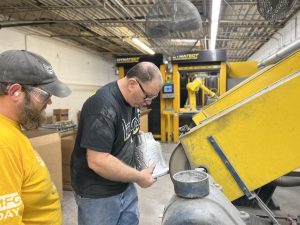
Powder coatings have many functions:
The powder coating process has 5 stages: polishing, degassing, cleaning, coating, and curing.
First, parts are polished to get a consistent surface. Next, they must be degassed. All castings naturally have air inside. If your part is not heat treated, it must be degassed to release the air, otherwise you’ll get imperfections in the coating. Then, the casting is chemically cleaned and surface is prepped so the paint will stick. Finally, the casting is powder coated and cured.
Aluminum castings can also be anodized. Anodizing not only creates an aesthetic finish, but gives the casting extra erosion protection.
There are two types of anodizing: conventional anodizing and hard coat anodizing.
Conventional (or type II) anodizing is known for its corrosion resistance, appearance, colorful options, and oxidation protection for a reasonable cost. However, the coating has low wear resistance and is easily scratched.
Hard coat (or type III) anodizing is the most protective. It’s known for wear resistance, corrosion resistance, strong insultation, and heat transfer properties. Unfortunately, this coating is generally limited on color options.
Castings can also be chrome plated for a shiny, stand-out finish. Zinc is more cost-efficient than aluminum to mirror buff and chrome plate. Zinc binds well with copper (one of the three layers required for chrome plating), making it overall easier to plate. Aluminum oxidizes quickly, making plating much more challenging.
The chrome plating process starts with polishing and buffing for a very smooth surface. An imperfections or uneven surfaces will be amplified in the plating. Then, parts go through a chemical wash to aid adhesion. The parts are then loaded onto large racks, where they’re put through a series of plating layers: copper, nickel, and chrome.
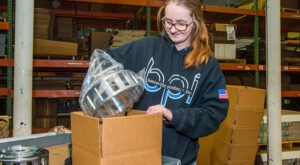
Finally, your product is ready to be packaged and shipped to you!
Ideally, this is your final step, but if you’re using multiple suppliers you may need to ship between each operation. This adds a lot of time, cost, and coordination headaches. But, if you use one full-service supplier, like Batesville Products, you don’t have to worry about shipping until the very end. You’ll get a product that comes in ready to assemble instead of shipping and receiving it after each operation.
If you have powder coated parts or parts with a high-class surface finish, you’ll want sturdy and protective packaging. This includes bubble wrap or even individually boxing each part.
Sometimes, customers provide their own custom, reusable dunnage that parts are sent back and forth inside.
It’s also up to you to select your preferred carrier. Pick one you can trust! If you need suggestions, ask your foundry who other customers most frequently use and who is easiest to schedule with. They ship every day, so they have lots of inside knowledge!
Congratulations! After these 11 steps, your design is brought to life!
Our final advice: When planning for manufacturing, keep the end goal in mind and work backwards. If you know what finish you want, if it requires threads, what your EAU is, the first few steps are a lot quicker and easier.
Questions? Contact us today! We’re the aluminum permanent mold casting experts.
Subscribe to learn more about permanent mold casting, such as our industry webinars and other content that will help you navigate the world of metalcasting.
"*" indicates required fields

 Guides