Finishing is a way to make your castings more visually appealing, through either polishing, painting, or powder coating.
In this article, we will review the finishing process, explain the key differences between paint and powder coats, and explore new industry trends.

When a casting makes its way to the finishing stage, it comes with a customized process sheet. This sheet will guide the creation of the piece and ensure all finishing expectations are met. This sheet is best made in collaboration between customers, finishers, and casters to ensure that everyone is on the same page and to avoid simple mistakes.
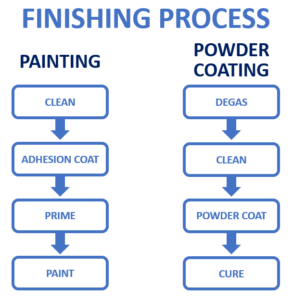
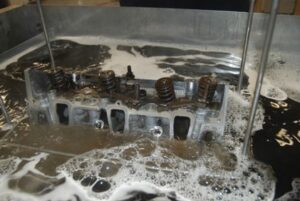
After understanding the expectations of a product, the finishers evaluate flash. Removing flash prepares the castings for coating in color. Castings can be cleaned with a variety of chemicals such as iron phosphate. Then, a small amount of fluoride or another prepping substance can be used to prepare the metal so that the paint will stick.

TIP: Always ask your finishers if they are using a multi-metal coater cleaner so you don’t have to worry about loss of color adhesion!
Priming helps hide any imperfections on the casting. Priming makes parts smooth, so the paint coat will lay better. Unrepaired imperfections will not lead to a class A finish. Therefore, if you have highly cosmetic finishing expectations, it is often cost effective to include a priming stage.
Powder coats are becoming increasingly popular! Within the past 25 years, companies have moved towards powder coats in exchange of air-dry paints because they are more environmentally friendly. Powder coats cut down on VOC (Volatile Organic Compounds).
But, it’s important to keep in mind that powder coats require an extra step in the finishing process called degassing.
If you are using an air-dry coating, the prepping process is as simple as cleaning the casting and coating it for paint adhesion. However, powder coats require a baking system. Since all castings have air trapped inside, we must first “degas” them before applying and curing the powder coat to avoid imperfections.
When degassing, we rely on the 15/15 Rule. For instance, if I have a powder that needs to cure for 10 minutes in a 325 degree oven, I will first degas it in a 340 degree oven for 15 minutes. After it cools down, I will put the powder coat on and bake it for 10 minutes at 325 to cure.
But, as you know, every product is unique. If a casting was heat treated at a high temperature, it may not need degassed. Degassing needs also depend on the powder used and the customer’s finishing expectations. If we use a powder that cures at a lower temperature, or the customer does not mind an “orange peel” textured look, the product may not need to be degassed.
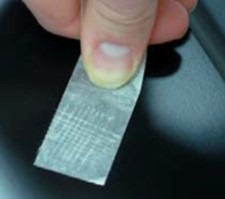
With this coating testing method, 16th of an inch squares are etched into the coating by drawing vertical and horizontal lines. Then, a piece of tape is firmly pressed on so that the adhesive goes into the grooves of the crosshatched pattern. After one minute, the tape is quickly ripped away. If none of the squares rip away, the coating is scored as a 5B, meaning 100% adhesion.


Another testing method involves pushing a #2 pencil into the paint. If the pencil lead breaks, then the coating is good to go. But, if the pencil chips the paint, the coating is under-cured.
The final testing method involves a MEK or acetone saturated rag. If the rag can be rubbed back and forth 25 times on the product without disintegrating the coating, the coating is good to go.
If a part is rejected, don’t worry, it can be reworked! Rejected parts are sanded and recoated every day.
There are lots of new trends on the horizon in the world of finishings. Some of these include: